Sunbird DCIM – SendQuick Integration Guide
Sunbird DCIM – SendQuick Integration Guide
1. Purpose of Document
This document is a guide on how to integrate Sunbird DCIM with SendQuick systems to send SMS alerts. In this guide, we will be using SendQuick Entera version 20141225-13HF4 and Sunbird Power IQ 9.0.0.194 for the integration illustration.
SendQuick supports receiving email SMTP, SNMP Traps or Syslog messages and converts them to SMS text alerts or notification to Social Messenger applications. In this document, we will highlight how to configure Sunbird DCIM to integrate with SendQuick via the email SMTP delivery method to send SMS text alerts.
2. Configure SMTP on Sunbird DCIM
When there is a need to send a notification alert, Sunbird DCIM can trigger an email to SendQuick that will then convert the email message to SMS. For this setup, SendQuick has a built-in SMTP that Sunbird DCIM can use as the SMTP Server.
2.1 Configure SMTP Server on Sunbird DCIM
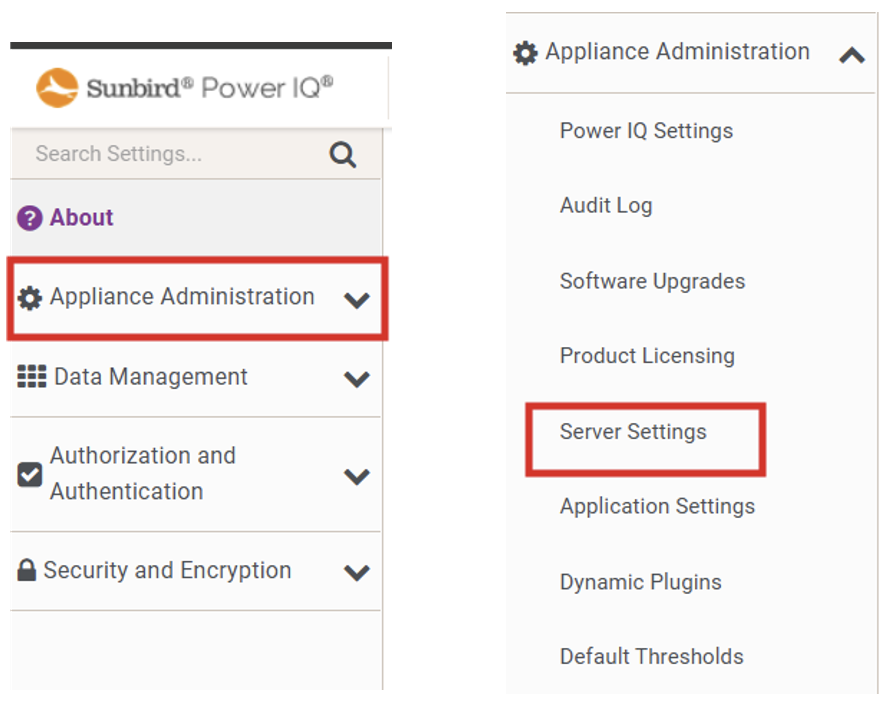
On the dashboard of Sunbird DCIM platform, navigate to the following item:

On the left panel find the “Appliance Administration” section, click on “Server Settings” then click on “Manage SMTP Servers”
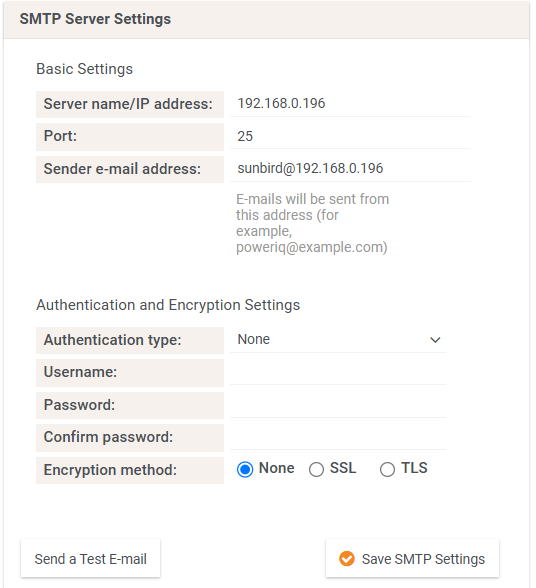
Fill in the fields for SMTP SERVER Settings.
In the field for Server name/IP Address key in SendQuick IP address (in our example, we are using 192.168.0.196). By default, the SMTP Port Number is 25. Leave the “SSL and TLS” box unchecked and leave “Authentication type” selection to None.
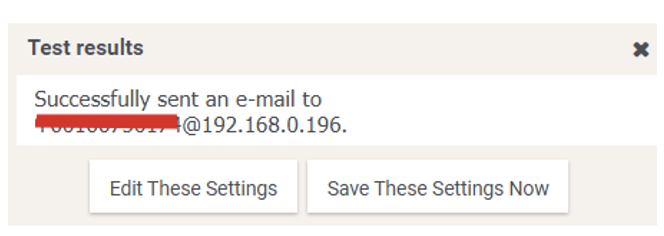
If you would like to test if the SMTP can send an email, click on “Send a Test E-mail” and test sending an email to see if the setup is correct.

Put the phone number to receive the SMS text as the email address using the format <mobilenumber>@<sendquickdomainname>. Replace <mobilenumber> with the phone number and <sendquickdomainname> with the Domain name of your SendQuick system.
If the setup is correct, you should get a Test Successful! notification. Click on “Save These Settings Now” to continue.
To confirm that SendQuick has subsequently received the email and sent out as SMS, go to SendQuick dashboard. Navigate to:
Usage Logs > Message Logs
Click on the Sent tab and SMS tab. If there is a corresponding entry in the logs, that means the SMS text was sent successfully.
Once your SMTP server settings have been set you are ready to add filters for event notifications
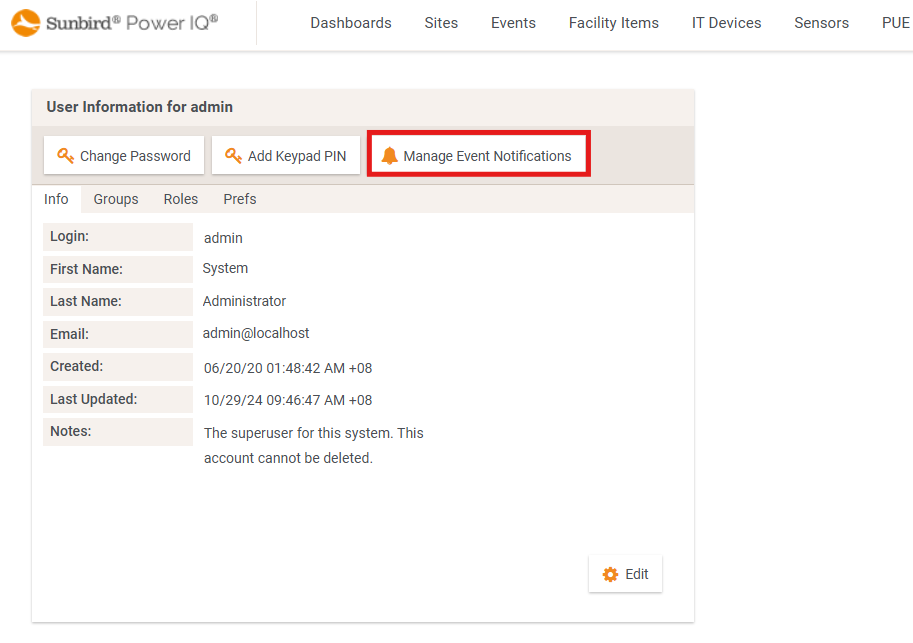
Go to Sunbird DCIM Dashboard, click on “Admin” and click “Profile”.

Click on “Manage event notifications“
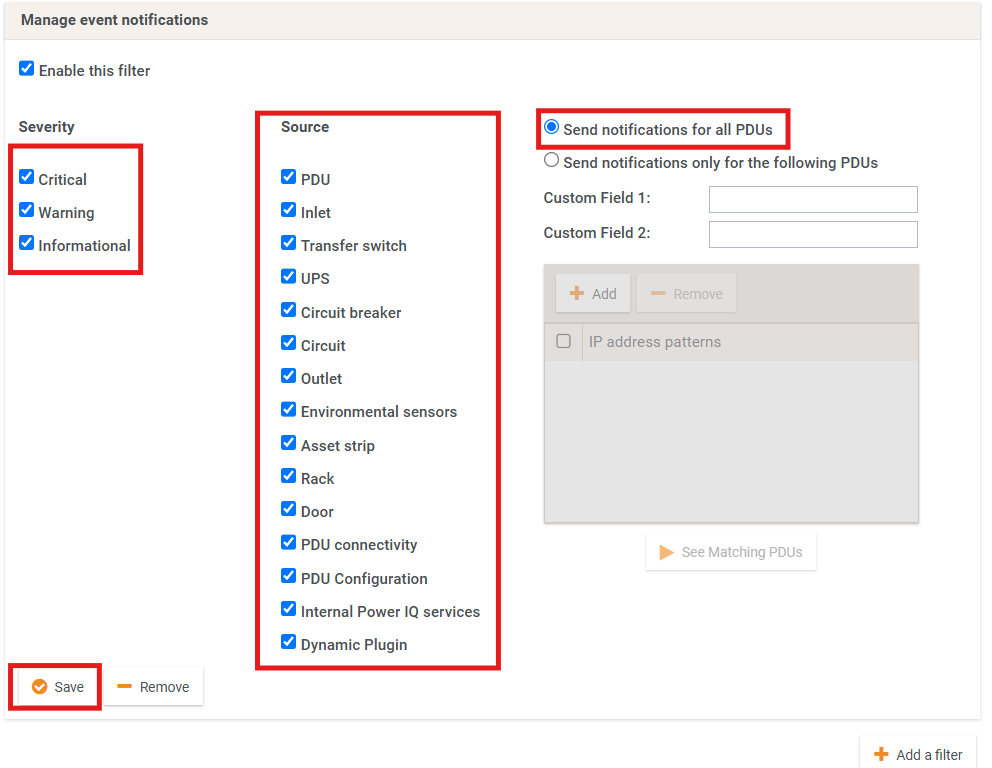
On the Manage Event Notifications page, tick all that apply for Severity and Source (depending
on what event end users wants to get notifications)
Select “Send notifications for all PDUs”
Click save once settings have been selected
When a triggering event occurs, PowerIQ will notify the event to via SMTP settings
to SendQuick to then send out the SMS Alerts.
Note : These guidelines are applicable for Sunbird power IQ and Sunbird DCIM


